|
|
|
Sue's Sewing and Happenings
Wednesday, February 17, 2010
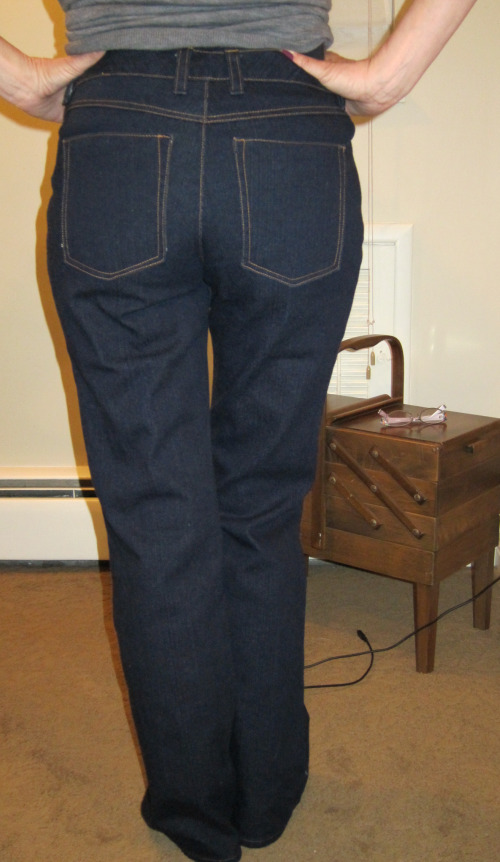
Jalie Jeans
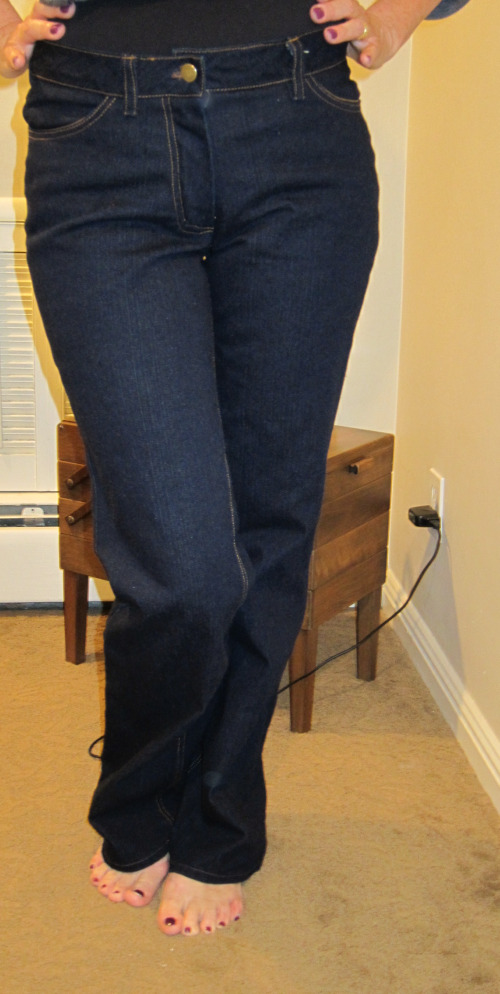
ok, so it's about time I add my backside into this jalie jean sew-a-thon that's continuing longer than the Duracell rabbit over at PatternReview.com !
Pattern Description: Misses jeans; boot cut, back pockets, back yoke, fly zip, low rise and medium rise.
Pattern Sizing: Jalie's wide range of sizes child to adult. One pattern gives you every size for most everyone
Were the instructions easy to follow? I didn't have any problems with the Jalie instructions, but I did make them 5 times and so by the 3rd time, I wasn't looking at instructions. I did however, use Sandra Betzina's fly zip install instructions on from Threads Click Here for tutorial
but, Betzina's instructions do not have a fly shield, and after zipping up my gut (ouch!), I saw this latest YouTube from Hot Patterns which is a nice variation of Betzina's and includes a shield! (Pair #4 will definitely have the shield). Click Here for HP's tutorial
What did you particularly like or dislike about the pattern? Jeans, jeans, jeans, I live in jeans, pretty much. And these have been reviewed a zillion times, not sure what makes them different and so workable, but they work! they fit with very little tweeking, and they don't look like "made with loving hands at home".
Fabric Used: denim, WITHOUT stretch. Yes, the pattern calls for stretch denim, but I didn't find it necessary. Pair #1 (which were too small) did have stretch; pair #2, (which were too big), didn't have stretch; pair #3 (which were too high) didn't have stretch; and I forgot what was wrong with the others, but in either case, stretch or no stretch didn't make a difference. Oh, I remember, what #4 problem was. I did a 4 part curved waistband and it was too tight, so consequently pulled the pants up higher and were uncomfortable.
Pattern alterations or any design changes you made: Each pair, I messed around with the waistband: cut on grain; cut on bias; cut on bias w interfacing; cut on bias w/o interfacing; and 4 part curved. I ended up coming back to the bias cut with interfacing. I narrowed it a bit. I also raised the center front of the low rise about 1/2". Because I found them a tad too low.
Would you sew it again? Would you recommend it to others?yes, yes, yes.
Conclusion: If you haven't gotton on the jeans bandwagon, do it! do it. I don't think I've every messed with a pattern as much as I did this one. I generally make something 1 or maybe 2xs then move on to the next, but I stuck to my goal, and got myself a great pair of jeans. Now, all I have to do, is figure out some sort of interesting pocket design, change the leg width narrower or wider, and use different denims and I got lots of new jean styles! Oh, and add some rivets ...
I was just looking at the photo and see that I can take a bit more out of the back... eek! and I notice the overlap on the fly where the button is could be a bit longer.... Pair #6.... here I go.
Posted by sue
at 10:55 AM PST
Tuesday, February 16, 2010
Vogue 1086
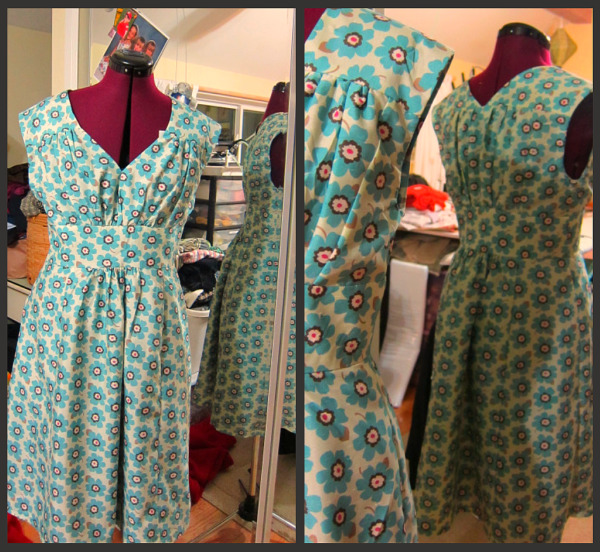
Pattern Description: Slightly flared dress, mid-knee, has princess seams, very loose-fitting bodice with yokes, forming cap sleeves, above waist midriff and left side zipper closure.
Pattern Sizing: Misses 8-24. I made my usual size 12 Did it look like the photo/drawing on the pattern envelope once you were done sewing with it? yes
Were the instructions easy to follow? yes. Although I generally just look at the photos as a guide. What did you particularly like or dislike about the pattern? I liked everything about this dress, the gathers, yoke, the nipped in waist.
Fabric Used: this is a Vera Wang fabric from the recent Fabric.com clearance. It was a buck ninety eight a yard as was the lining! It is a poly that has a really nice sheen and texture. I ended up going back and buying more the minute my order arrived because I liked it so much. I also lined this dress entirely with another VW poly in a tan color. Not sure how all this poly is going to feel, but it sure is pretty! I generally don't use a polyester, but it was so pretty, I couldn't resist.
Pattern alterations or any design changes you made: The only thing I did differently is lined the entire dress. I love having my dresses completely lined. It makes for a nicer neckline- sew it RST and flip it out and edge stitch the lining down. Otherwise, this pattern wants you to use binding around the neck which is ok for a tee, but not a dress, IMHO. I also didn't do the topstitching. My machine with nice stitching is in for repairs, and the machine I am using doesn't have a really nice stitch, so I didn't want to take a chance with ruining it with crappy top stitching.
Would you sew it again? Would you recommend it to others? I would sew this again. It's a cute summer dress.
Conclusion:
I wish I had a wedding or shower to go to, this would be the perfect dress.
Posted by sue
at 11:19 AM PST
Monday, February 15, 2010
Three-Day Weekend and 80+ Degrees
When it's so beautiful outside it's hard for me to sit inside and sew! I gotta get out. Yesterday my sisters, their families, and I went for a hike up Haines Canyon. Haines is in the San Gabriels and was devasted by the Station Fire. At the mouth of Haines there's a debris basin which has trucks and excavators working around the clock to keep it clean and clear to protect the homes below. We hike up Haines about 3 miles. It's barren, black, and ash. The rocks and everything burned, and what hadn't burned has been moved, and moved some more by the mud flows of the recent storms. The road is filled with deep (2-3 feet) rain gulleys, the check dams (I suspect that were built during the 1930's by the Conservation Corp) are blown out, and boulders precariously hang over the trail. But, under all this devastation is lots of things that had been hidden for years. Bottles, fence posts, pottery, utensils, cans, toys, house foundations, an old army camp, tools, and Buffalo nickles just to name a few. You walk up the trail looking down for things half buried, and looking up for what may have been a house. This collage shows my nephew sitting on a wall on what used to be a house. The stove in the background. I wonder who lived there? We spotted the stove hanging over the edge above and hiked up to it and found the foundation of what used to be a fairly good size house, with a great view of the San Fernando Valley. You can also see in the photo pictures of new growth coming out of the burned area, trail markings, the dams, and the view down the canyon. 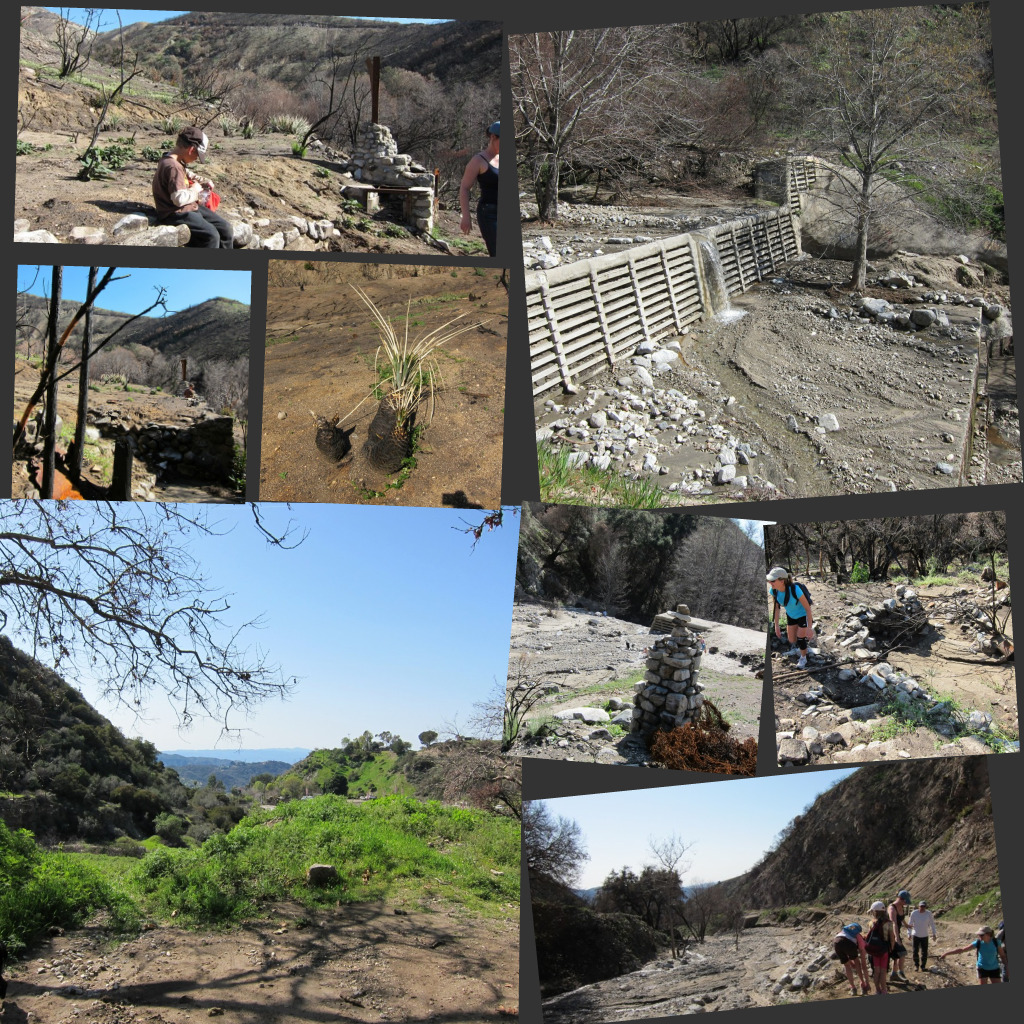
I love having these mountains in my "front" yard and the Verdugo Mountains in my "back" yard. It's another beautiful day, not sure I'll sit inside to sew, but I know I'll be back out exploring.
Posted by sue
at 9:29 AM PST
Friday, February 12, 2010
Jeans are done!
I finished my jeans and am wearing them today. I hope to have pictures of me wearing them up this weekend. DH took a couple of photos this morning, but they didn't turn out well, so I need to redo them. I have to tell you, and I've said this a zillion times, I really prefer the buttonholder on my cir. 1950 Singer 301 much much better than my 200X Pfaff. It just does beautiful bottonholes. It just amazes me that this little buttonholer contraption can take a straight stitch only machine and make a beautifully zig zagged buttonhole and my computerized top of the line with over 350 stitches cannot. 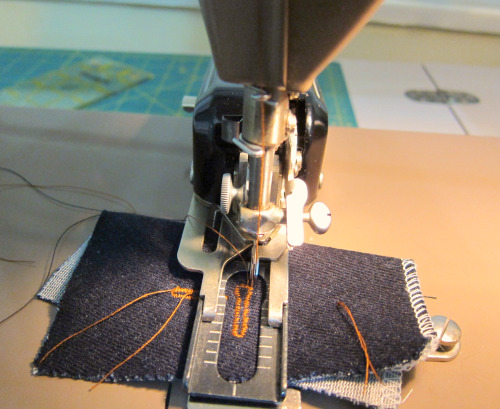
Look at it! It's beautiful! 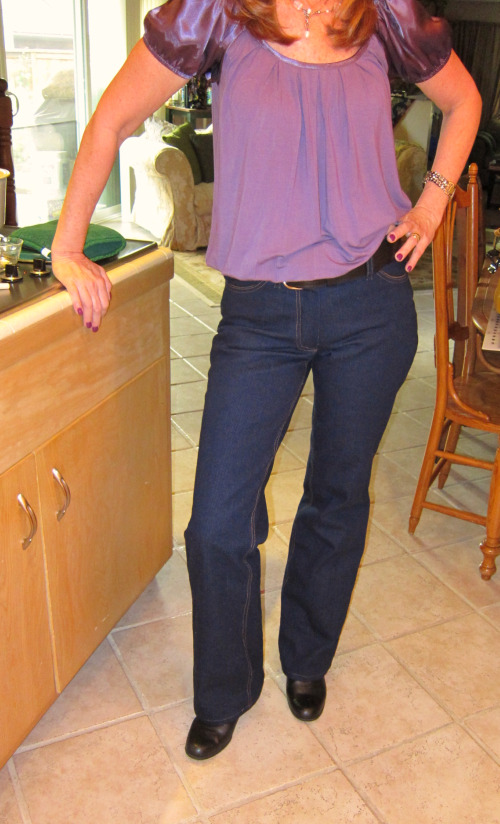
It's a 3 day weekend, and I'll be home, so you know what that means.... lots of sewing! Happy President's Day!
Posted by sue
at 10:10 AM PST
Updated: Friday, February 12, 2010 10:17 AM PST
Wednesday, February 10, 2010
Working my way through Jeans No. 4
I got the front and back pockets and fly zipper done on my jeans. Here's the Jalie line drawing of the jeans. 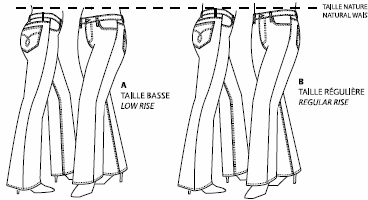
I'm making a modified low rise version. I lined the back pockets. I saw this idea on another blog (can't remember which one) and thought I'd try it. I didn't put any fancy stitching on the back pockets as I kinda like the way DKNY does her's... plain and simple. 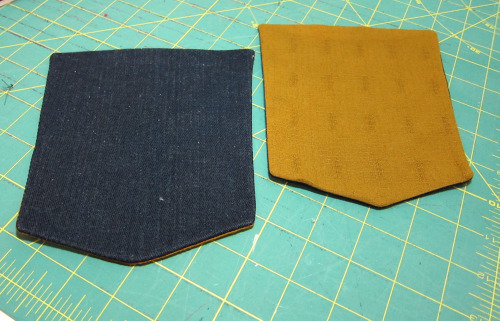
Here's the pockets. I used a rust colored Japanese cotton. I like brown and blue together, and since this will sorta peak out, it will match the top stitching 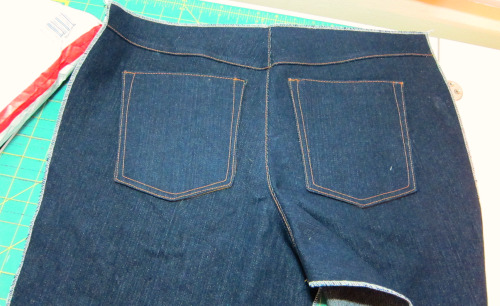
I think I will add another row of top stitching on the yoke. It looks a bit too plain now that I see it photographed. 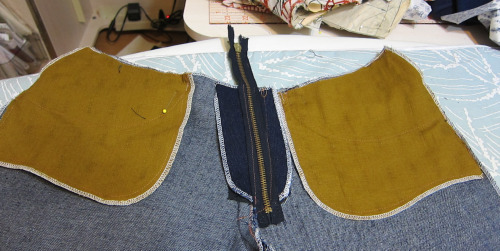
Here's the pockets inside front. I used the edges with white which was the color already in the serger. I was too lazy to change thread, and no one will see the inside anyway. I interfaced where the zip goes and used Sandra Betzina's method to install it. http://www.threadsmagazine.com/item/3831/video-an-easy-flat-fly-front-zipper Trudy at Hot Patterns has another similar method located here https://www.youtube.com/watch?v=WxBzdoV2jT0 I think I will try this method on jeans no. 5 (can you really have too many pair of jeans). 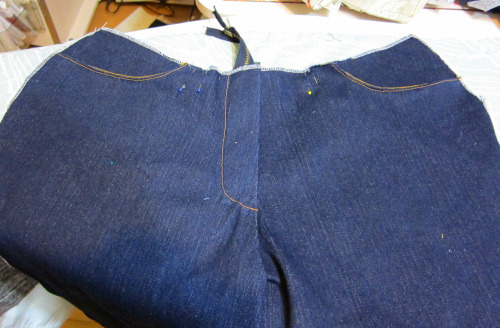
I also think I will add another row of topstitching on the zipper and the pockets. Tonite... maybe I'll get them finished!
Posted by sue
at 1:38 PM PST
Updated: Wednesday, February 10, 2010 1:57 PM PST
Newer | Latest | Older
|
|
|
